
Set up a company on Leave Dates
When you create an account on Leave Dates, the first step is to set up your company. Company settings define how leave is calculated, displayed, and managed for all employees.
This guide is intended for company admins and HR managers who are setting up Leave Dates for the first time. By the end of this article, you will have configured the core company settings required to start managing employee leave.
In this article
- Create a company on Leave Dates
- Set Leave allowance units
- Set the first day of the week
- Set hours per working day
- Change visibility of leave accruals
- Create a company work schedule
Create a company on Leave Dates
To create your company:
- Go to Settings > Company.
-
Under Company name, enter the name of your organization.
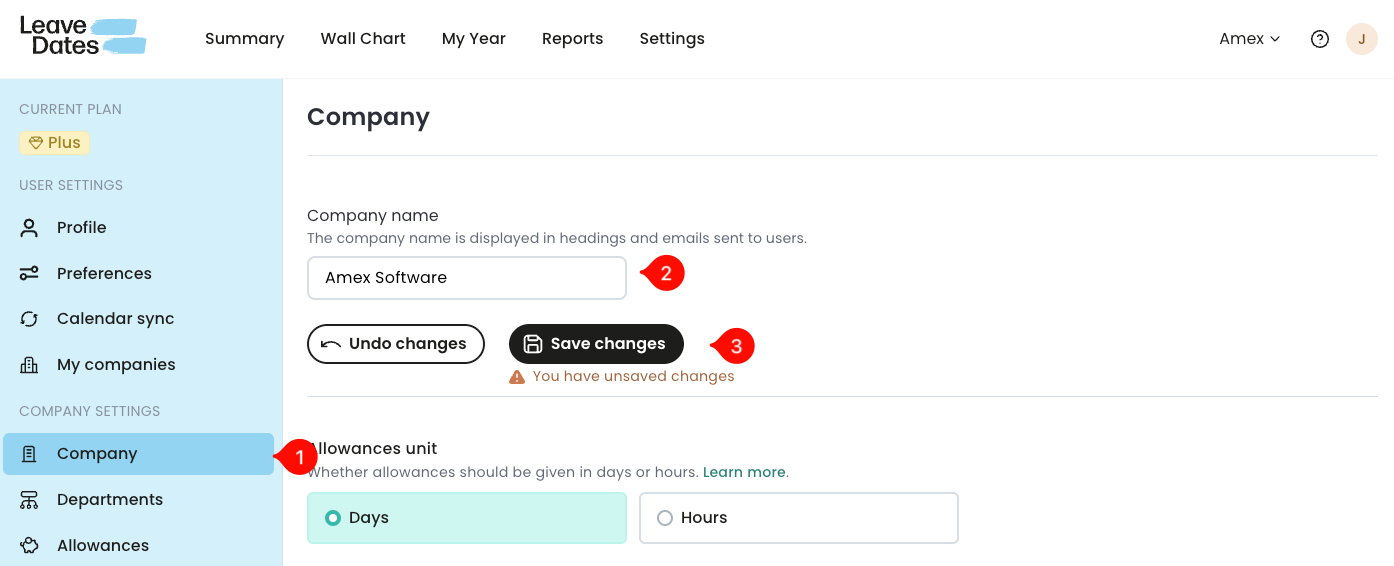
You can change the company name at any time after the initial setup.
This name is:
- Used in emails sent to employees
- Displayed on employee dashboards when they log in
- Select Save changes.

Set leave allowance units
Leave allowance units determine how employee leave entitlements are measured. Depending on your organization’s needs, leave can be tracked in days or hours.
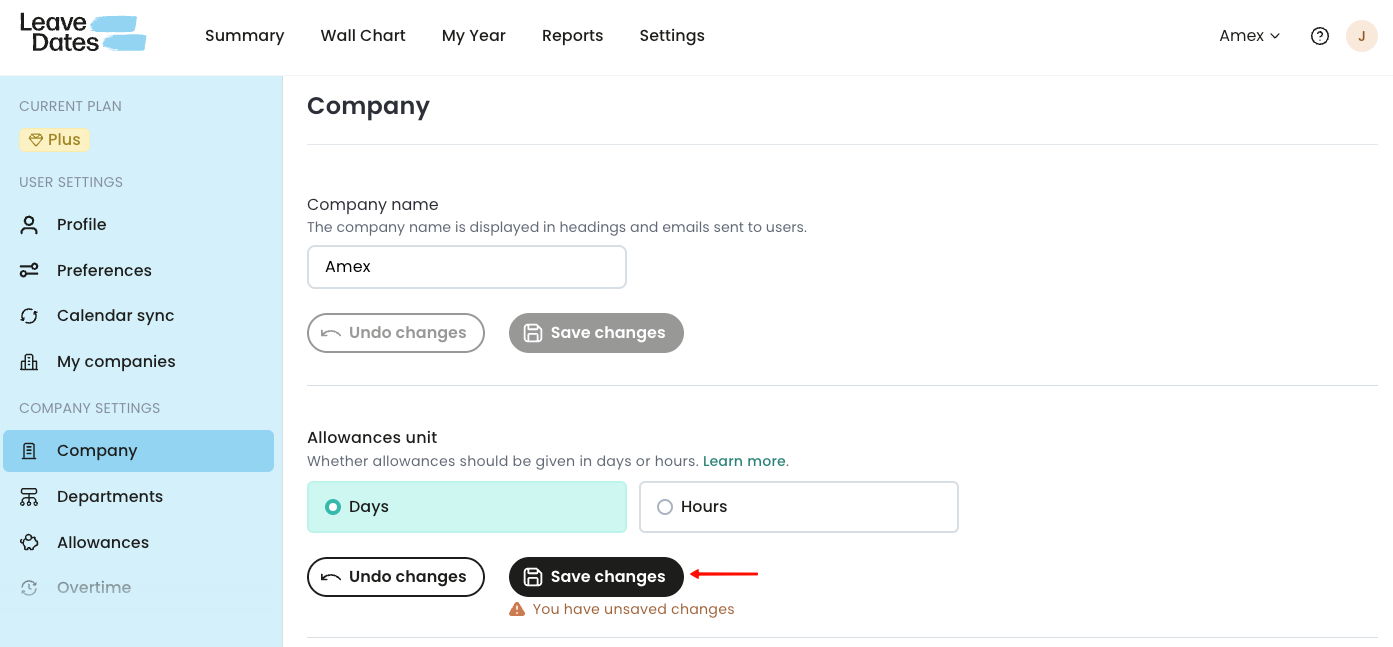
Days
- Leave allowances are calculated and displayed in days.
- Employees are not limited to full-day leave.
- Employees can request:
- Half-day leave, or
-
Specific time intervals for a day
Example:
An employee with a 20-day annual entitlement can request one and a half days leave.
Hours
- Leave allowances are calculated and displayed in hours.
-
Employees select the exact time range they will be on leave for each selected day.
Example:
An employee can request leave from 10:00 AM to 1:00 PM on a specific day.
Leave Dates uses the selected allowance unit to calculate and display each employee’s annual leave entitlement.
Admins can override the default leave allowance unit for individual employees from their profile settings. To do that, go to Settings > Employees. Select an employee and find Allowances unit in the employment details tab.
Set the first day of the week
The first day of the week controls:
- How weeks are displayed in My Year
-
How weeks appear in the Wall Chart
By default, Leave Dates uses Monday as the first day of the week. You can change this to match your organization’s location or internal policy.
To change the first day of the week:
- Go to Settings > Company.
-
Select a day from the First day of the week dropdown.
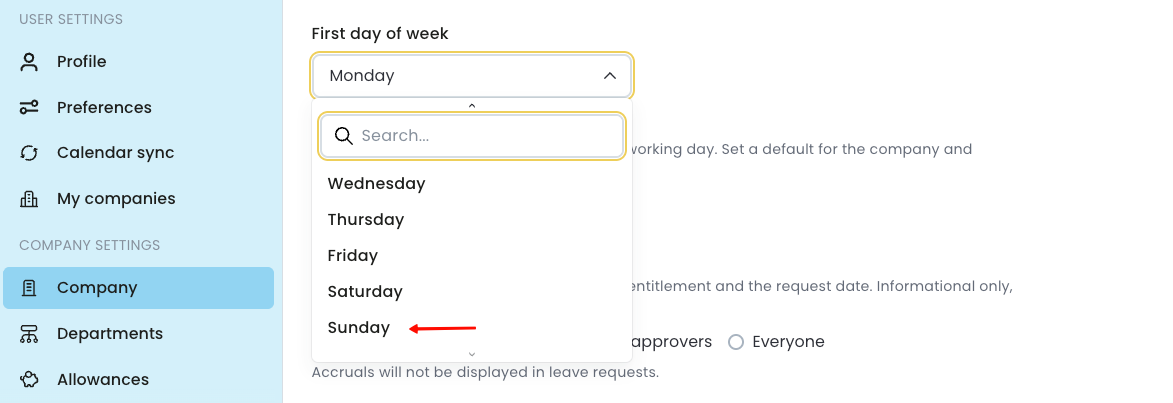
3. Select Save changes.

Set hours per working day
The Hours per working day setting defines how many hours make up a standard working day in your organization.
This setting is used to:
- Convert leave between days and hours
-
Recalculate leave accurately if you change the allowance unit later
Example:
If one working day equals 8 hours and you switch leave tracking from days to hours, Leave Dates automatically converts existing leave balances and requests.
Admins can customize hours per working day for individual employees in Settings > Employees, under the schedule tab.
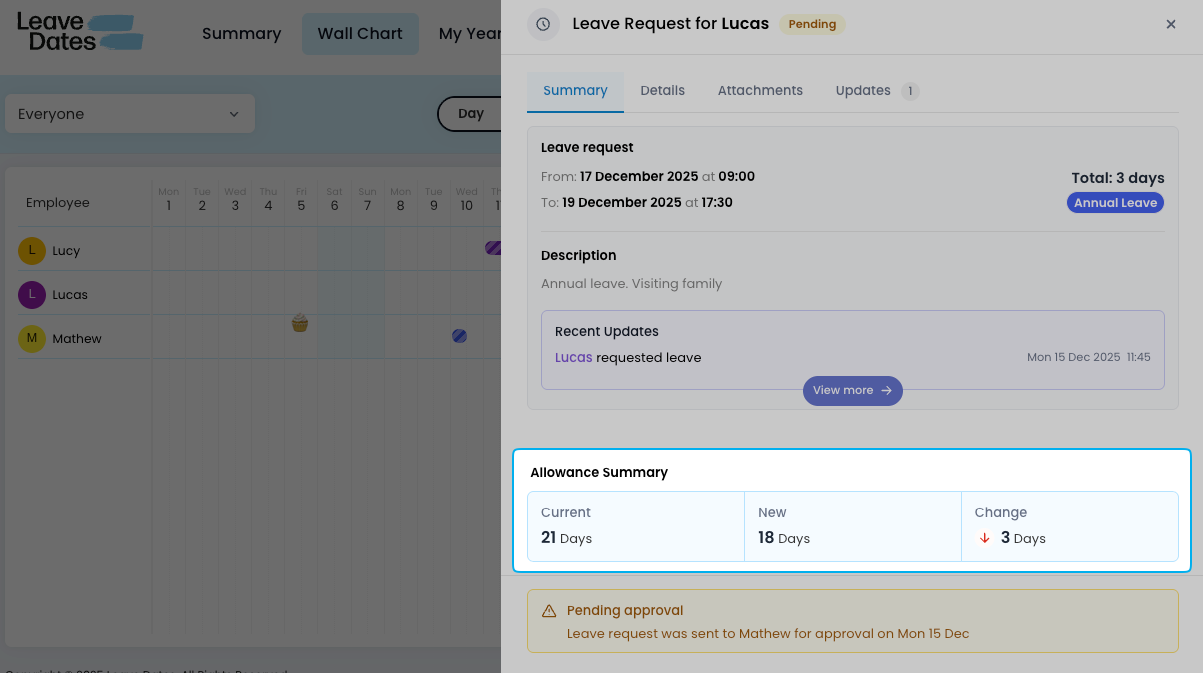
Change visibility of leave accruals
Leave Dates automatically calculates accrued leave for each employee based on:
- Annual leave entitlement
- The leave request date
- The employee’s start date (if the leave year is aligned to employment start date)
You can control who sees accrued leave information when a leave request is submitted:
-
Don’t show
Accrued leave is hidden from everyone, including admins and approvers.
-
Show to admins and approvers
Only admins and approvers can view accrued leave details.
-
Everyone
Employees, admins, and approvers can all view accrued leave details.
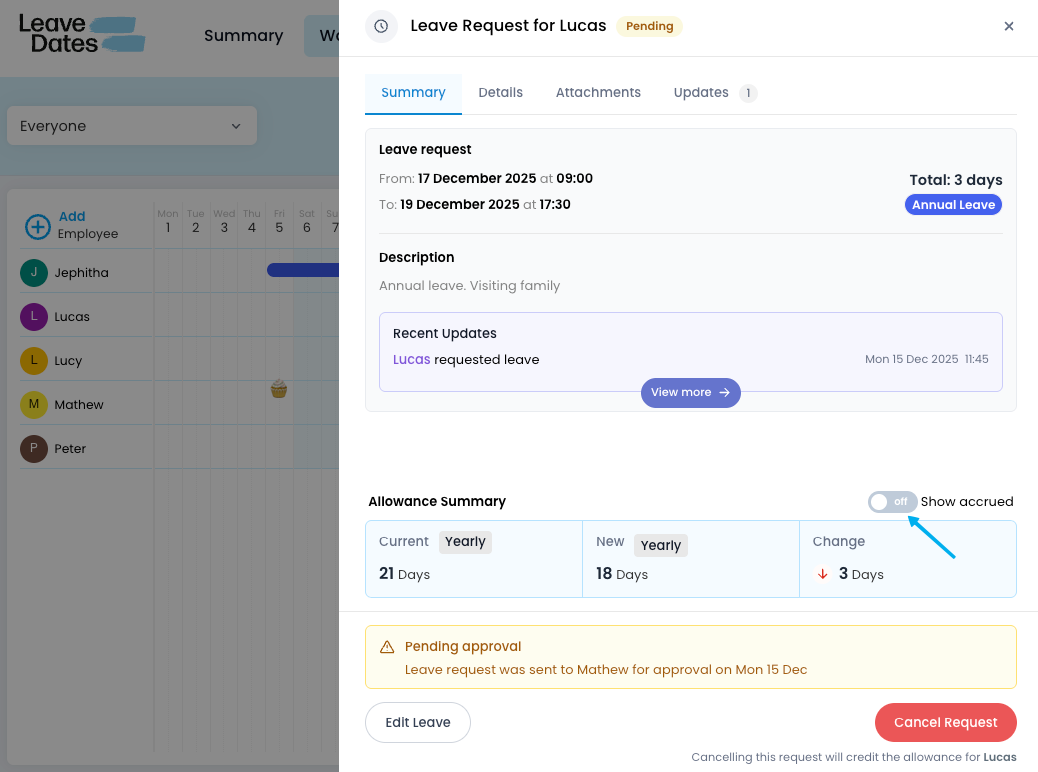

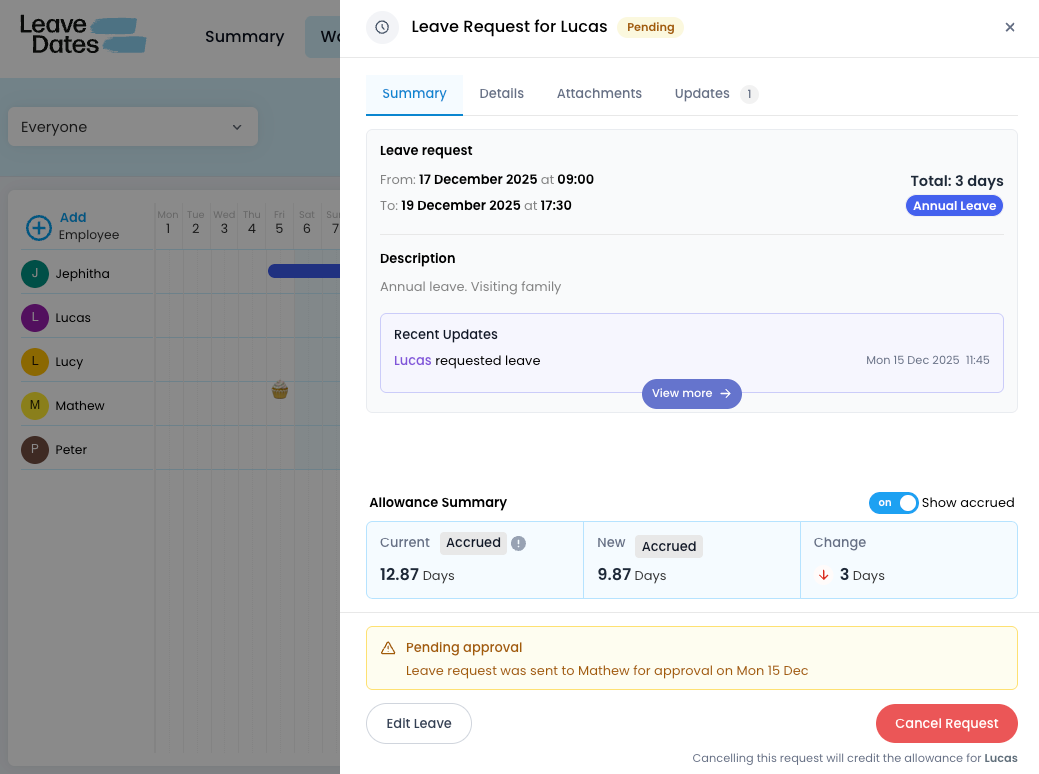
Accrued leave is shown for informational purposes only and cannot be edited.
Create a company work schedule
A work schedule defines:
- When employees are expected to start and finish work each day
-
How leave is deducted
For leave tracking purposes, each working day is divided into two half-days (morning and afternoon). This allows Leave Dates to accurately track half-day and partial-day leave.
The company work schedule applies to all employees by default. You can override it for individual employees from their profile.
To create a work schedule,
- Go to Settings > Company.
- In the Work schedule section:
- Set the morning session start and end times for each working day.
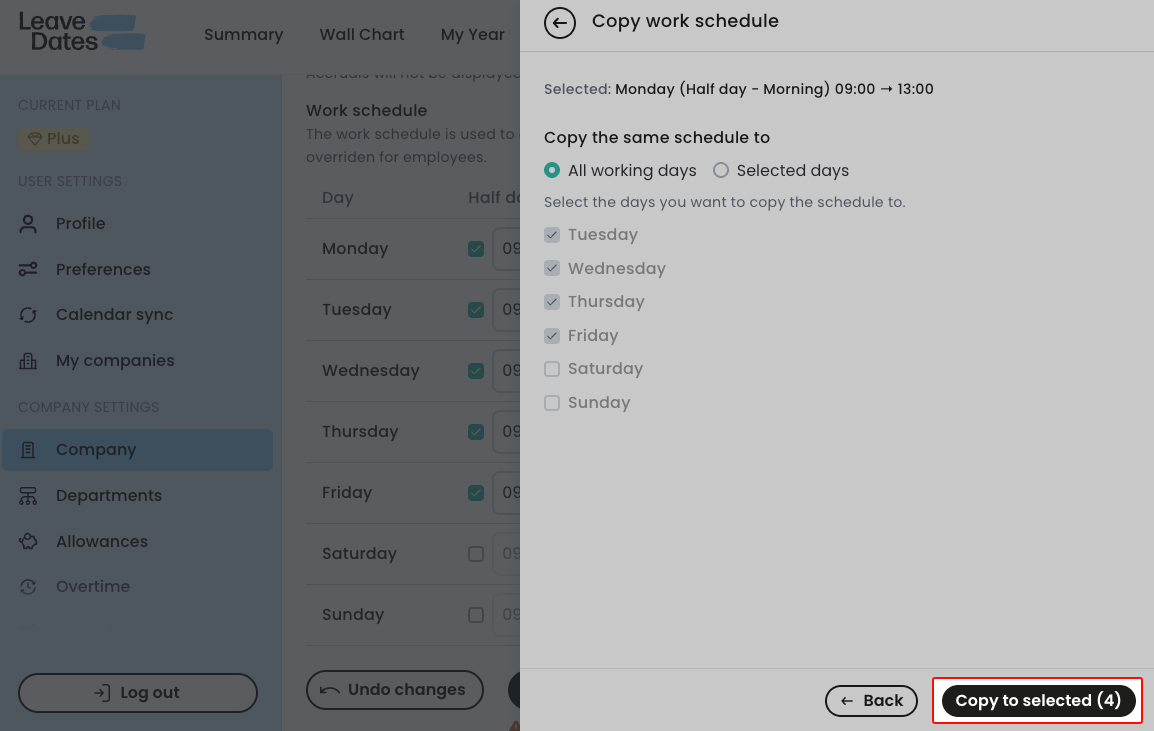
- Use the Copy button next to a day’s session to apply the same times to other days.
- Choose whether to copy the session to all working days or selected days, then select Copy to selected.
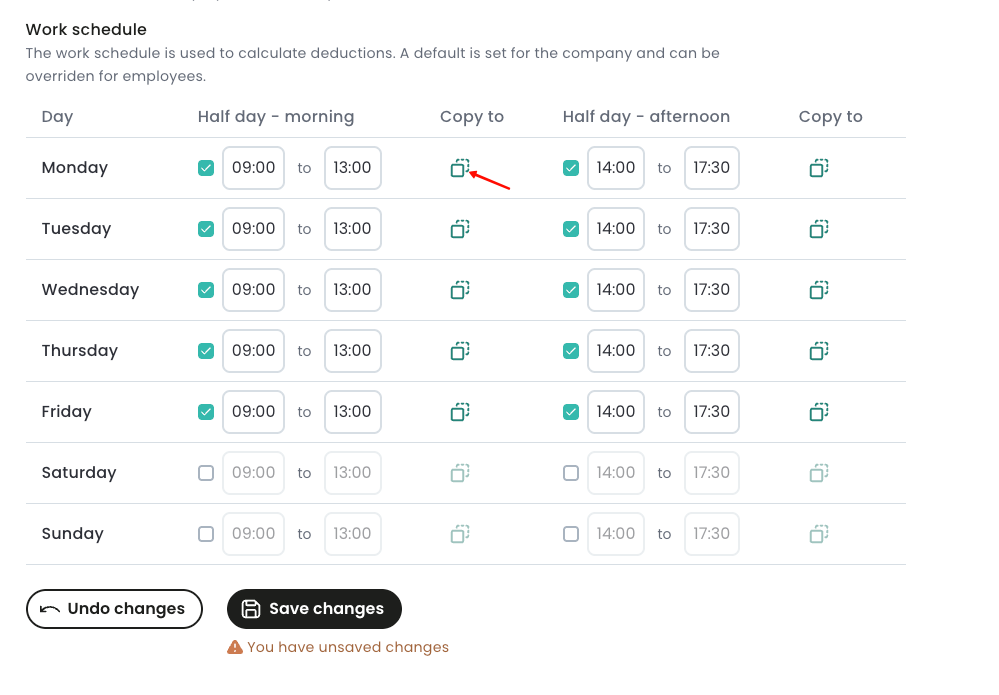
- Set the afternoon session start and end times for each working day.
- Use the Copy to feature to apply the same times across multiple days if applicable.
- When finished, scroll down and select Save changes.