Manage employees
This article covers the essential actions for managing employee profiles, including setting up employee details, inviting employees to join Leave Dates, and keeping your employee list accurate as team members join or leave the company.
In this article
View, search, and filter employees
Add an employee to your company
Invite an employee to join Leave Dates
Send an invitation reminder to employees
Restore or delete archived employee profiles
Recover deleted employee profiles
View, search, and filter employees
All your employee records are available under Settings > Employees. Here you can view the list of all employees that you have invited to your company on Leave Dates. The employee list shows the name and email address, the department, status, and user roles assigned to each employee.
For easier accessibility, you can search employees by name or email address, and filter profiles by their department, assigned user roles, or their status. From here, you can also add new employees, invite all employees, see archived employees and deleted employees.

Add an employee to your company
To add employees to your Leave Dates company profile, go to Settings > Employees.
- Select Add employee.
-
Under Personal details, enter the name of the employee, their job title, email address, date of birth, and select their timezone. The name and time zone are required, but you can proceed without adding a job title, email address, or date of birth.
The employee will use the email address provided here to create an account and to log in to Leave Dates. If an email is not provided, the employee can’t log in to manage their leave requests. In that case, an admin or approver can submit leave requests on behalf of such an employee.
When the date of birth is provided, a reminder is shown in the Summary page across the web, mobile app, and the slack report if the birthday falls within the next 7 days. An employee can choose to hide their birthday in Settings > preferences > Privacy settings.
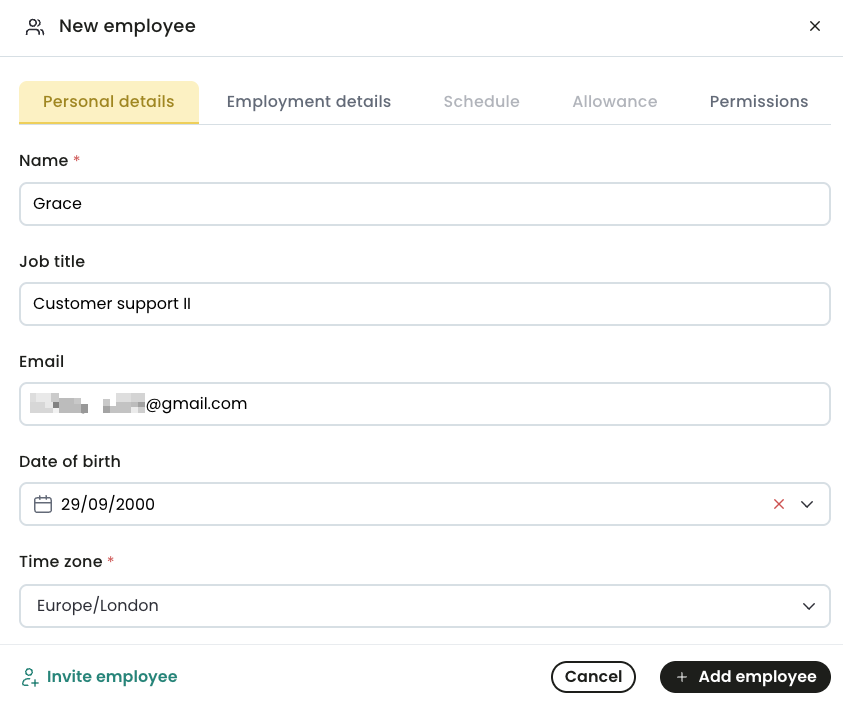

At this point, you can select Invite employee to notify them to join you on Leave Dates. You can also select Add employee to save the employee profile with just the personal details and complete the other sections later.
- In the Employment details tab, all the details are optional and you can proceed without changing anything.
-
Select the employment start date, and the employment end date.
The start date is the date the employee started with the company. It is used to calculate the prorated leave allowance for an employee whose start date does not align with the company leave year.
The employment end date can be used when an employee is terminated or for contractors working for a predetermined period. It is also used to calculate prorated leave allowances.
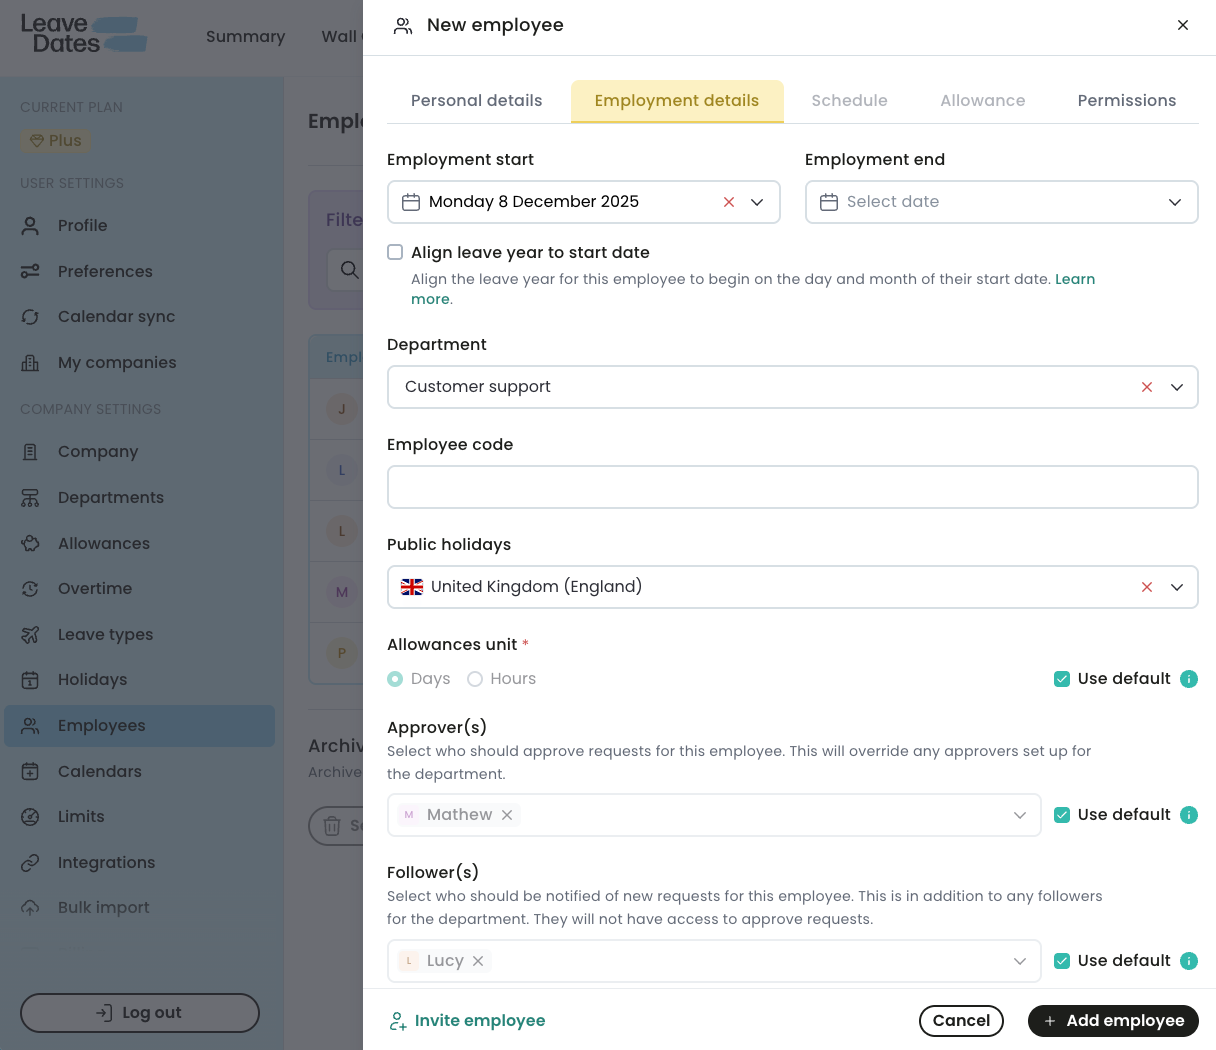
- Optional: Select Align leave year to start date. If not selected, the employee’s leave year will align with the calendar year. This setting is especially useful if each employee has a different leave year based on their start date. This feature is only available on the Plus subscription plan.
- In Department, select the department to which the employee is assigned. By default, the employee will inherit the leave approvers and followers of the department they belong to. The alternative is to manage approvers and followers per employee.
- In employee code, enter the unique identifier assigned to the employee by your company. This is optional and does not affect how leave is applied or approved.
- In public holidays, select the country or location used to decide public holidays for the employee.
- In Allowances unit, you can set the employee to accrue and apply for leave in days or hours. You can also check the Use default to let the employee use the default leave allowances unit configured for your company.
- In Approver(s), select the name of the person who will be responsible to review and approve leave applications submitted by this employee. Alternatively, check the Use default to the right so the employee profile uses the default approver for their department.
-
In Followers, select the name of the person who should be notified when this employee applies for leave. Alternatively, check the Use default to the right so the employee profile uses the default follower for their department.
In (g) and (h), a person can’t be an approver and a follower at the same time.
-

- Select the Permissions tab and:
- Assign an appropriate role to the employee. There are three possible roles of Admin, Approver, or hidden.
- Set what the employee can see in the wall chart. The options are Everyone, limited, or selected departments.
Select Add employee to finish.

Invite an employee to join Leave dates
After adding an employee, you can invite them to start tracking their time off in Leave Dates.
To invite an employee, go to Settings > Employees. Here, you can see all the employees you have added to your company and their status. There are three employee status:
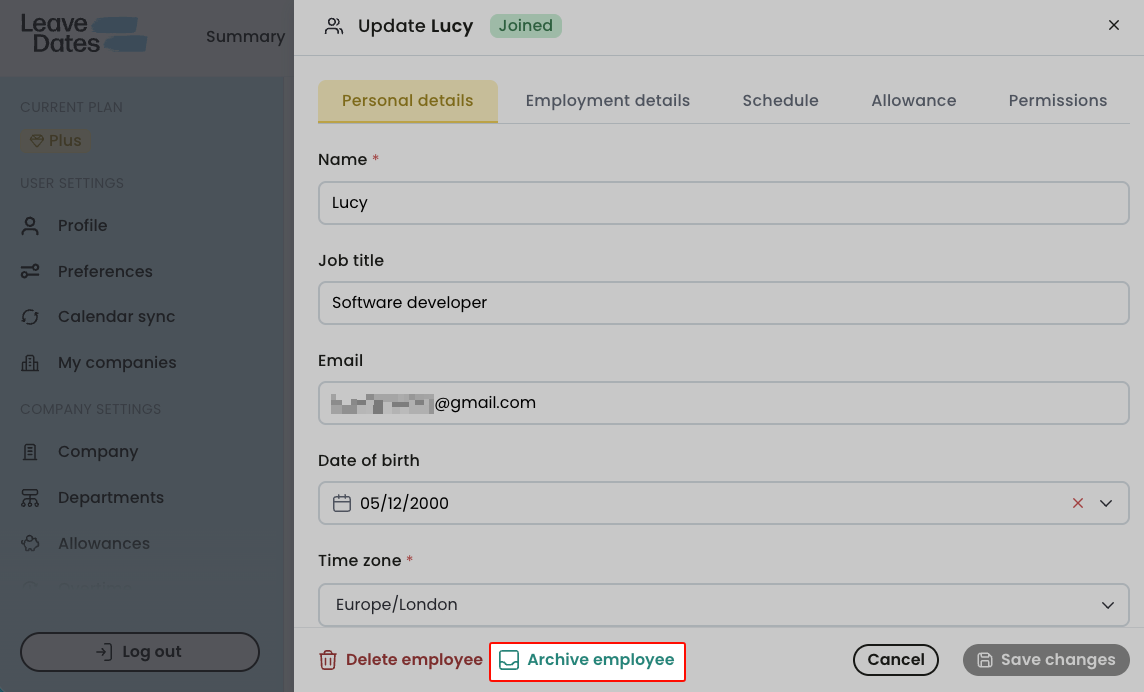
- Joined: this employee has been invited and they have accepted the invite and joined your company on Leave Dates.
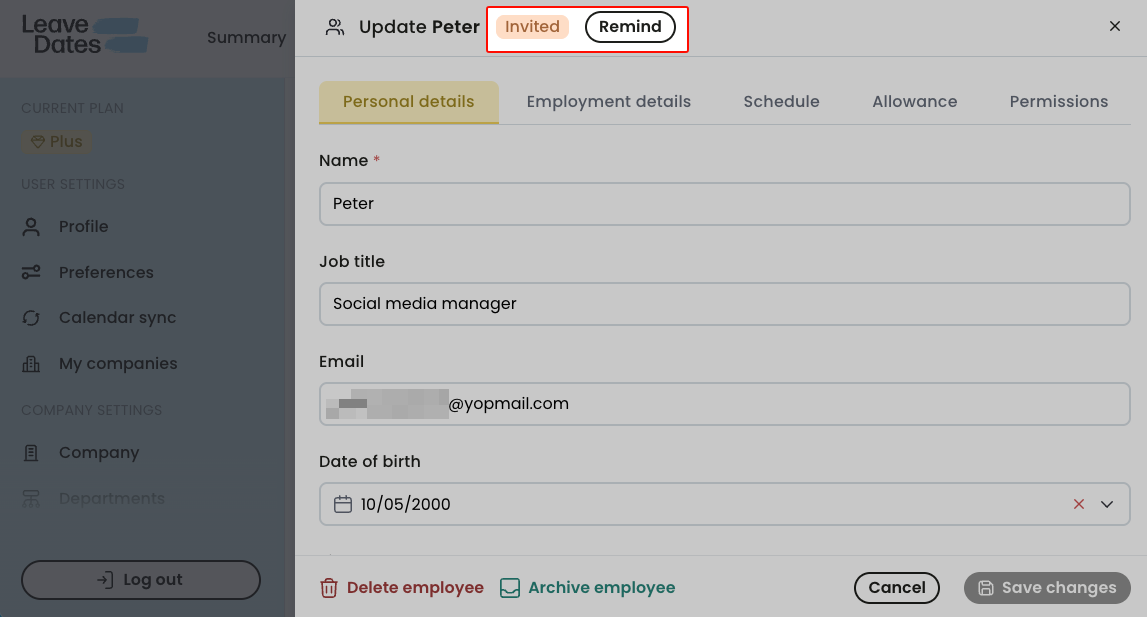
- Invited: You have already sent an invitation to this employee, but they are yet to accept and join your company. You can send this employee a reminder to start managing their leave on Leave Dates.
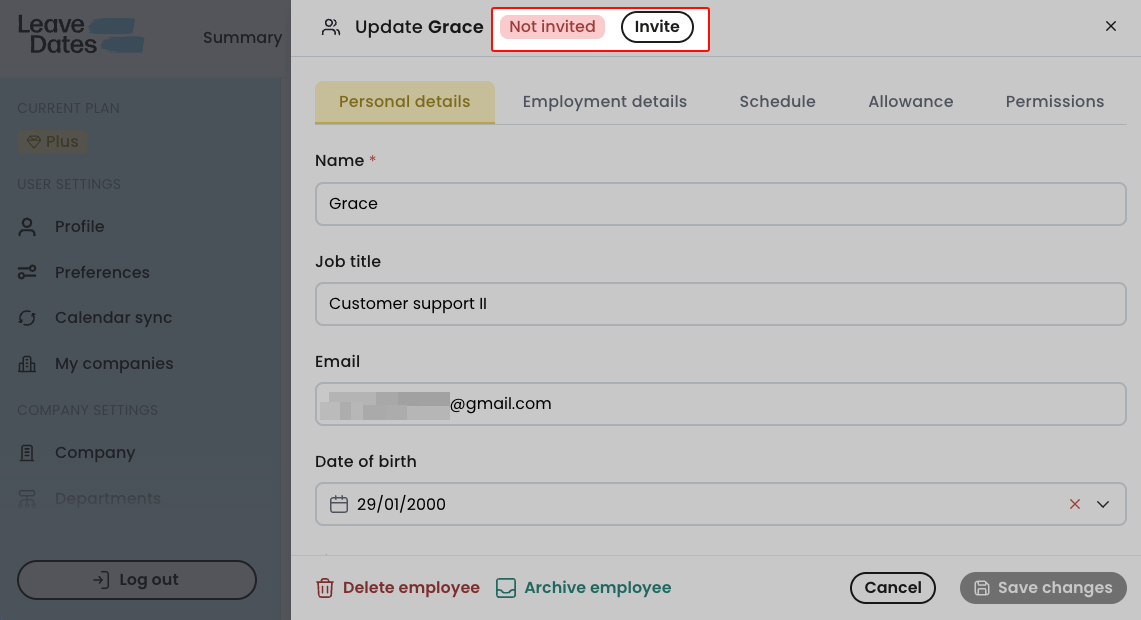
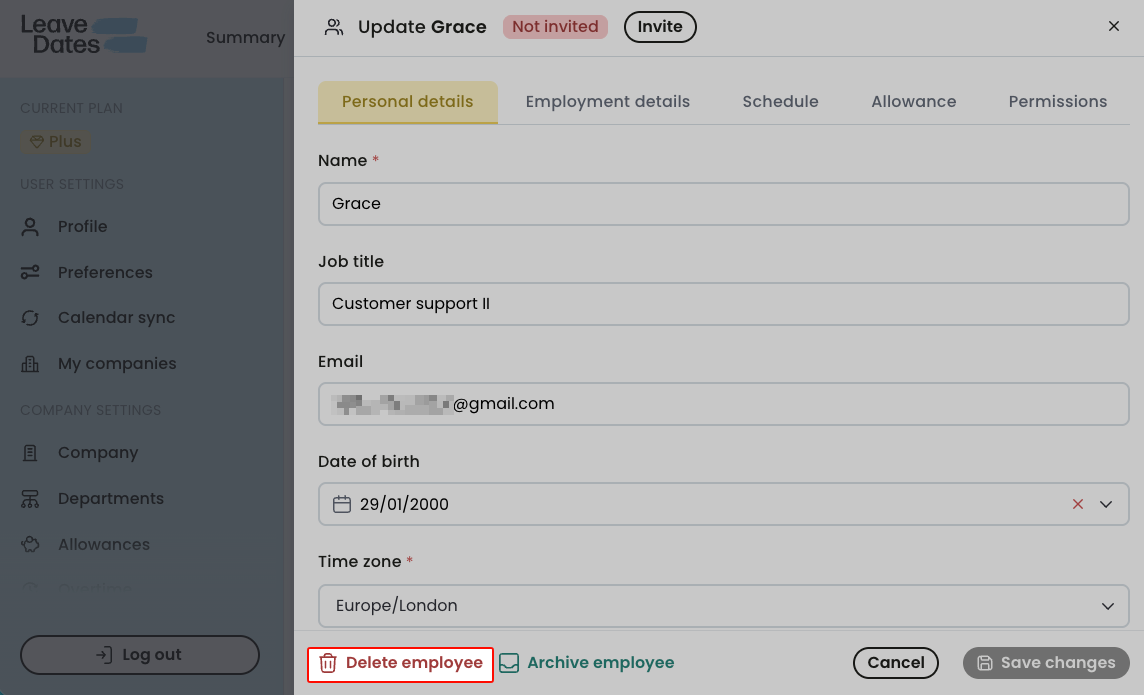
- Not invited: You have not invited this employee. Your next step is to add their email and invite them to manage their leave on Leave Dates.
To invite an employee to join your company,
- Identify an employee who has not been invited before - where the status is “Not invited” - and click on their profile. Use the status filter to narrow the search.
-
Confirm there’s an email address in the profile, then select Invite employee.
The employee will receive an email inviting them to manage their time off in Leave Dates.

Send an invitation reminder to employees
If you invited an employee and they have not joined your company yet, you can send them an email through leave dates to remind them to start tracking their leave in Leave Dates.
To send a reminder email,
- Identify the employee you want to send a reminder to and click on their profile. Set the All status filter to Invited to easily find employees who have not joined Leave Dates.
- Confirm that you have the correct email address on their profile.
-
Select Remind.

Archive an employee profile
You can archive employee profiles to stay organized and maintain a current employee list. Leave dates retains all the employee data and the archived profile can be accessed at any time.
- Archived employees do not count towards your subscription’s employee limit.
- This feature is not available on the Starter subscription plan, but is available on the Essential and Plus subscription plans.
To archive an employee profile:
- Go to Settings> Employees.
- Click on the name of the employee you want to archive.
-
Select Archive employee.

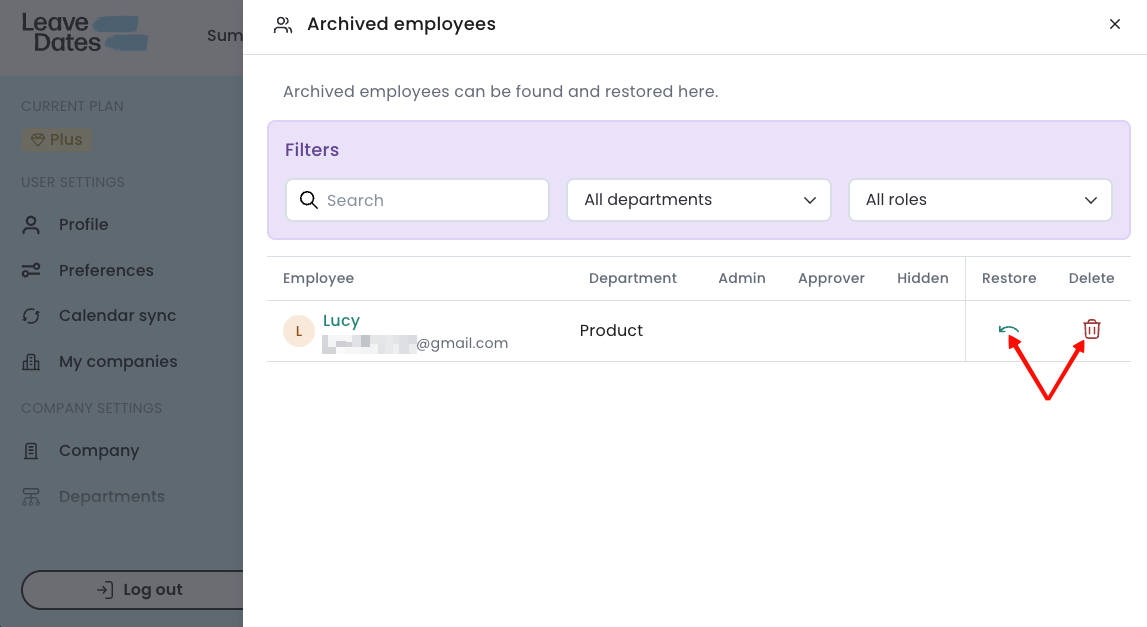
Restore or delete archived employee profiles
To restore an employee from the archive, you must have adequate unused employee seats/licenses in your subscription.
- Go to Settings > Employees.
- Select See archived employees.
- In Archived employees, identify the employee profile you want to restore.
-
Click the green arrow icon to restore the employee or the red trash can to permanently delete the profile.
In this step, you can also search for an employee by their name or email address and filter profiles by their department or user role.

When you restore an employee profile, all their historical data available in Leave Dates is restored. This includes their leave allowances, accrued overtime, and applied leave.
Delete an employee profile
You can remove people who no longer work with you from your employee list to stay organized or to create space for new hires.
Deleting an employee is a permanent action and you should be careful to only remove employee profiles of non-active employees. In Leave Dates, it takes 14 days before the employee data is permanently erased from our records. During this time, you can restore the deleted profile and recover all their data including leave applications and allowances. Any settings changes done to their profile e.g, a custom schedule, or
To remove an employee from your company in Leave Dates,
- Go to Settings > Employees.
- Click the name of the employee from the list.
-
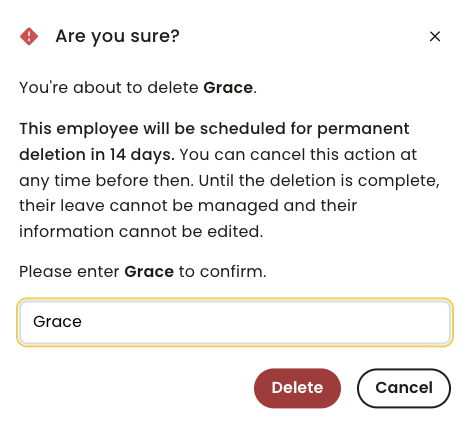
Select Delete employee.
-
Enter the name of the employee, then select Delete.


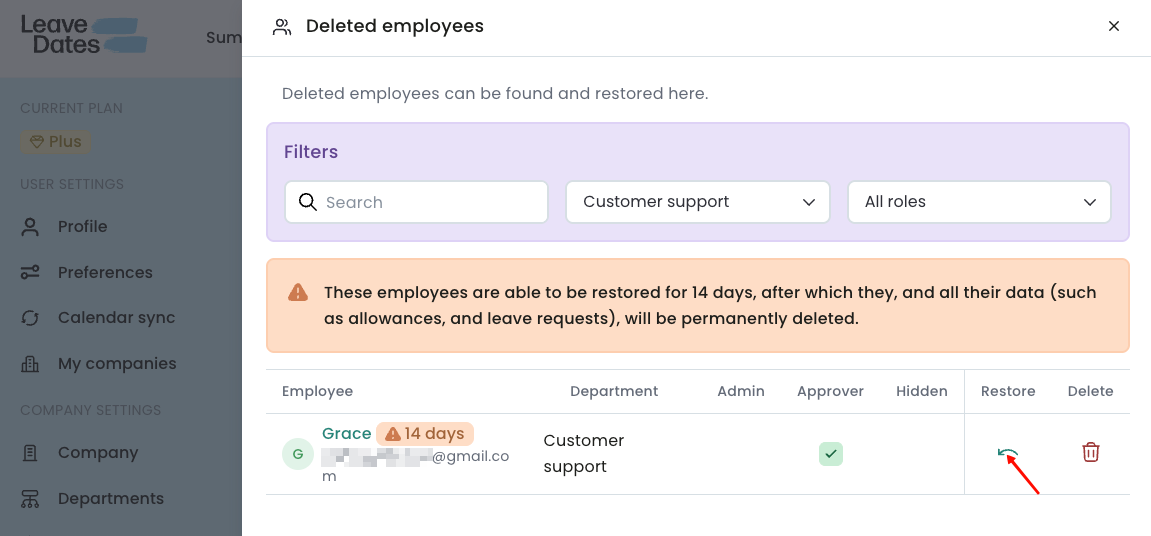
Recover deleted employee profiles
When you delete an employee profile, Leave Dates preserves all the profile data for 14 days. You can recover the delete profile if you change your mind within this period. After 14 days, the profile is permanently deleted and cannot be recovered.
To recover a deleted employee profile, check that you have at least one unused license/seat in your subscription, then:
- Go to Settings > Employees.
-
Select See deleted employees.
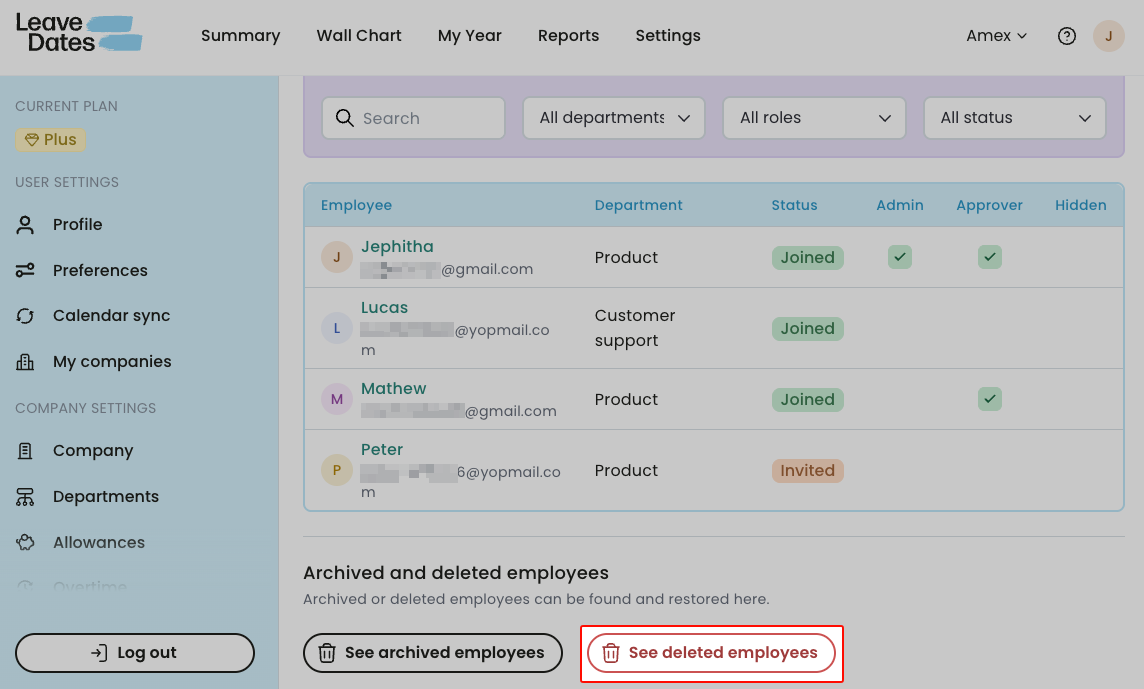
- Identify the employee you want to restore. Here you can search the employee by name or email address and use the department and roles filters.
-
Select the green arrow icon to restore the profile.
Once an employee profile is restored, all their allowances and leave requests are also restored.
To permanently delete the profile and skip the 14-day grace period, select the red trash can.